Transmogrification
Folder: Configs/Transmogrifications/ (any file name, .cfg)
Transmogrification lets players change how an item looks — including its color — without changing its stats. As admin, you decide which skins a given NPC offers, and what they cost; the rest (picking an item, previewing, applying, removing) happens entirely in a player-facing UI you do not need to configure.
Once you have written a profile here, put its name in a Transmog-type NPC's Profile field to make it live — see Core identity settings. It can also be reached remotely, without a nearby NPC, by listing it under TransmogrificationProfiles in Distanced UI.
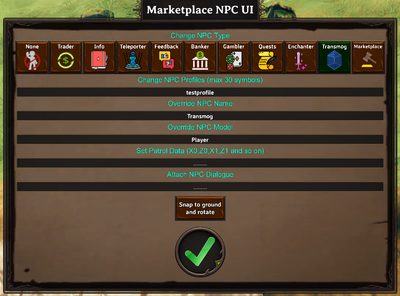
A complete example, explained
Configs/Transmogrifications/cosmetic_shop.cfg:
[cosmetic_shop]
SwordCheat, Coins, 100, false
CapeLinen, Coins, 50, true
| Field | Meaning |
|---|---|
| item | The item whose appearance gets applied to whatever the player is reskinning. |
| cost item | Currency item required. |
| cost amount | How much of it. |
| ignore category | true/false — see Categories and "ignore category" below. |
What the player sees
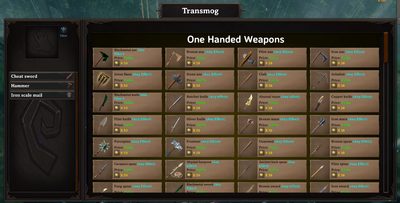
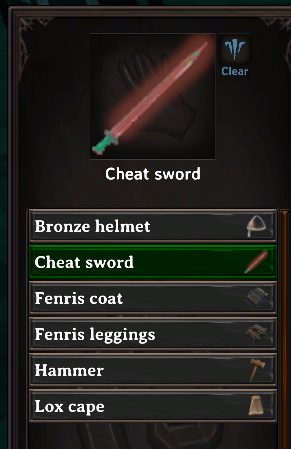
- On the left, the player picks an item from their own inventory to reskin. Only actual equipment shows up here — weapons, shields, armor, capes, tools, utility items — not consumables or materials.
- On the right, the skins available for that item show up, grouped into the matching category plus any
ignore categoryskins (see below). Skins the player cannot currently afford are dimmed. - Each skin has an optional hex color field — the player can type a color code to recolor the skin before applying it, entirely separate from what you configured.
- A preview button shows the result on the player's own character before committing, so nothing is spent by mistake.
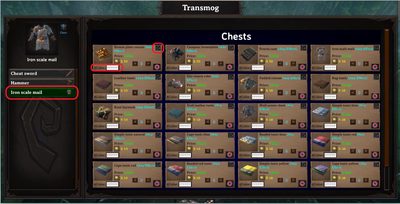
Clicking the skin's add button spends the cost item and applies the transmog immediately:
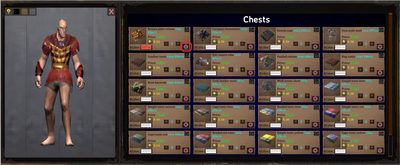
Already-transmogged items are highlighted in the player's inventory list so they can tell at a glance which of their gear has been reskinned.
Categories and "ignore category"
Skins are sorted into categories that mirror the game's own equipment slots: One-Handed Weapon, Two-Handed Weapon, Two-Handed Weapon (Left Hand), Bow, Tool, Shield, Chest, Helmet, Legs, Cape, Utility. By default, a skin only shows up under the category matching its own item type — a skin made from a sword only offers itself to players reskinning a one-handed weapon.
Setting ignore category to true changes two things at once:
- The skin appears in a separate Any bucket, shown to the player no matter what item type they are reskinning — this is how you let a skin cross categories, like applying a two-handed axe's look onto a one-handed sword.
- The normal type check is skipped entirely, which also means the skin prefab itself no longer has to be equipment at all. This is how you can use something like a trophy as a "skin" for a weapon:
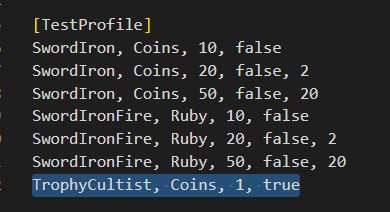
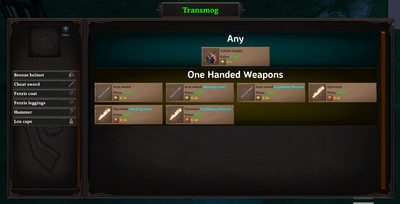
Because the type check is off, mismatched combinations (a two-handed skin on a one-handed item, a non-equipment prefab as a skin) are visually possible but not guaranteed to look or animate correctly. Use ignore category deliberately, and test unusual combinations before offering them on a live server.
A worked example with several tiers
Configs/Transmogrifications/testprofile.cfg:
[testprofile]
SwordIron, Coins, 10, false
SwordIronFire, Ruby, 10, false
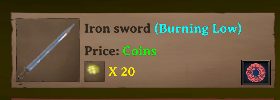
This profile offers two skins to whoever is reskinning a one-handed weapon: a plain Iron Sword look for 10 Coins, or a Fire Sword look for 10 Ruby.
Applying a skin, step by step:
| Choose the item to reskin | Choose the skin |
|---|---|
 |
 |
| Confirmed | Result on the item |
|---|---|
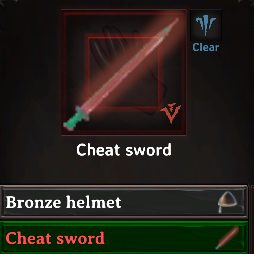 |
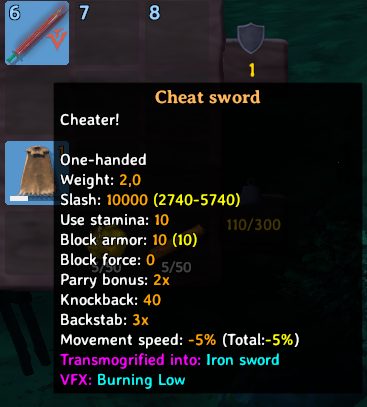 |
The item's stats, attack animations, and everything else about it are unchanged — only its model and color are affected. Equipping it shows the new look immediately:
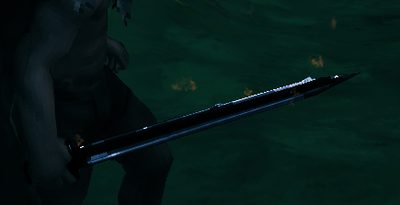
Removing a transmog
Players can revert an item to its original appearance at any time from the same UI, at no cost — select the transmogrified item and use the clear/revert option. This removes both the applied skin and any custom color.
Related
- Profiles — how a transmogrification profile name groups skins across files.
- Server config —
EnableTransmogLog, to log transmog actions to the server log. - Distanced UI — remote access without a nearby NPC.
- Migrations — an older visual-effects field that used to exist on this page's config format was removed in version 9.0.8.